Table of Contents
Installation
You can download FFAStrans from the FFAStrans home page FFAStrans Home Page
Installation steps:
Unzip to C:\FFAStrans this location is not mandatory but highly recommended currently
Although FFAStrans is a portable software, it is recommended to place installation folder directly on “C:\FFAStrans”. The reason for this is that FFAStrans writes files into it's /db directory and windows UAC would keep it from doing so if you extract it into %programfiles%. We are working on that.
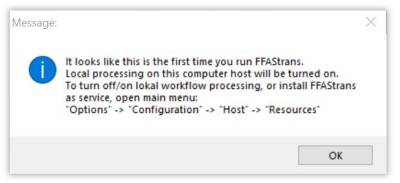
Double click FFAStrans.exe to launch it. A message is displayed during the first launch.
Configuration for Local use:
(See Deployment Options for professional use).
Configure Media Cache:
The Cache location corresponds to a folder in which FFAStrans will temporarily store the working files (encodings in progress, files being demuxed, etc.) before delivering them to the destination folder. It is recommanded to choose a different drive from the installation location and to make sure there is enough space available. The encoding jobs you run in paralell, the more space you will need.
Go to the 'host' tab and under 'local host media cache' click to define your cache folder.
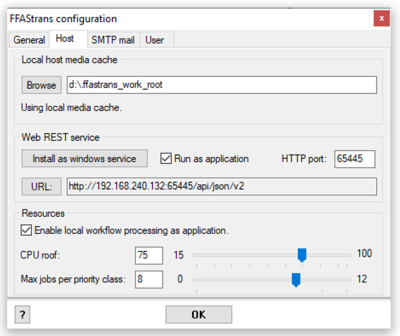
Leave 'use local media cache' checked if you plan to work locally.
'Use global media cache' is only for use with multiple machines/hosts in a farming environment.
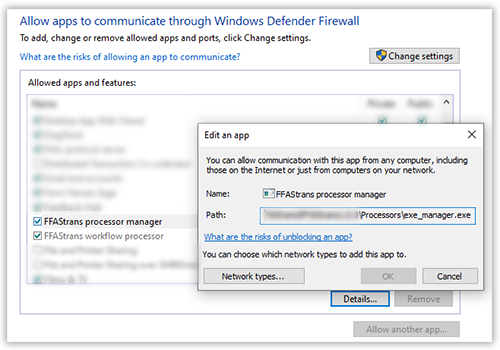
Make sure windows firewall allows the “exe_manager.exe”(Windows security→Firewall→allow an app through the firewall : FFAStrans processor manager), otherwise FTP watch folders may not work properly.
Hosts groups:
With FFAStrans you can group hosts into different named groups and assign nodes or/and workflows to them.

Hosts groups principle :

Understand hosts groups configuration:
Passive Mode:
If you execute the FFAStrans.exe binary with the “-passive” argument, the FFAStrans manager will start as normal but the computer from which you started it will NOT act as a working host. This is ideal if you just want to manage a FFAStrans environment from another computer on the network.| In passive mode the the “Workflow” title pane will have a pear-ish color and the title will display “FFAStrans Workflow Manager (-PASSIVE MODE-)”.
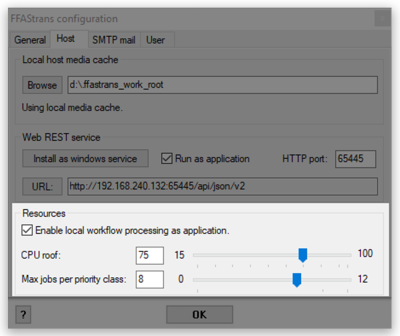
- Resources: You can tick 'enable local workflow processing as application' and set the maximum CPU utilization and the number of jobs processed at the same time (depends on the power of the cpu). To understand how FFAStrans manages priorities, see Priority flow chart and example.
It is recommended not to exceed 85% or risk freezing the application or the system.
Click 'ok' to save your settings.
Web REST Service
A REST API Service in general is needed in order to allow other external programs like the Webinterface to interact with FFAStrans.
Run as local application :
- The “Web REST Service” Button is only of interest when you do NOT run FFASTRANS as Service but as application instead. When installed as service, the API Server is automatically enabled
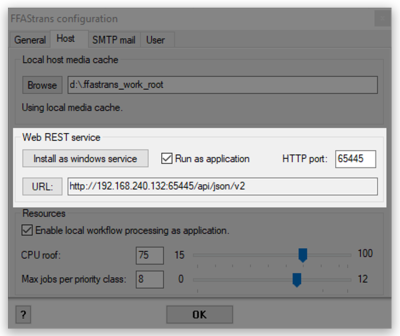
Install Windows Service (Highly recommended)
When running as windows service, the Windows Service named “FFAStrans REST API Service” is actually not only serving the REST API but also driving Watchfolders and Workflows.
Running as Windows Service means that the workflows work in the background without need to launch the application and you do not even need to log on as a user after rebooting the server.
To install the windows service, in first place make sure that you started the application using the full UNC path instead of using a mapped drive letter.
Click on “Install as windows service”. 'Install as windows service' changes to 'Remove windows service' and 'Run as application' is now greyed.


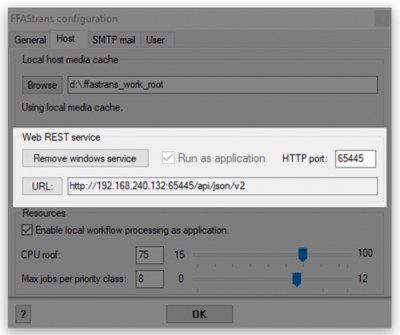
Reboot computer to automatically start service or start it manually by typing “services” in the windows start menu and search FFAStrans REST-API.
Right click and 'start' the service manually.
Important Note about credentials for windows service :
If you install the windows service, it will be installed with standard Local System User. To be sure to access to all your shared folders, you should log on with administrator account or an account which belongs to administrator group.
Right click on FFAStrans REST-API service, select properties, log on tab.
Enter your account name (e.g: administrator@domain.com) and your password. When using NAS Shares, the chosen account must be able to read/write on all Shares.
After saving, you need to restart the Service in order to apply the changes.


